Bake Along #128 Japanese Cheese Cake
March 4, 2020 2021-09-04 17:22Bake Along #128 Japanese Cheese Cake
Bake Along #128 Japanese Cheese Cake
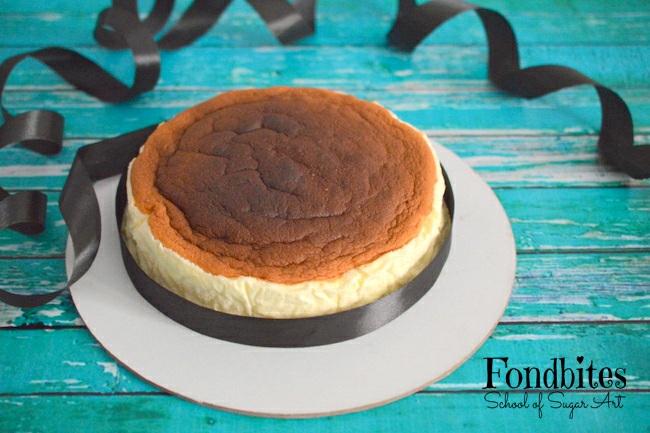
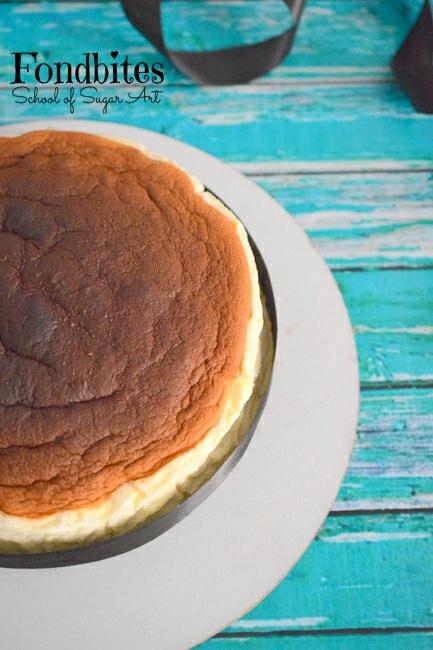
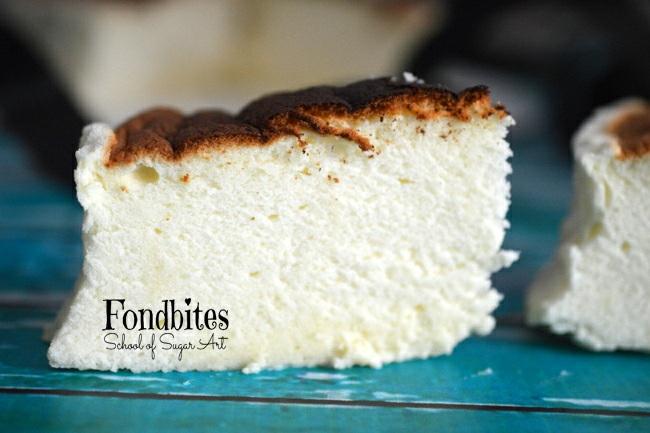
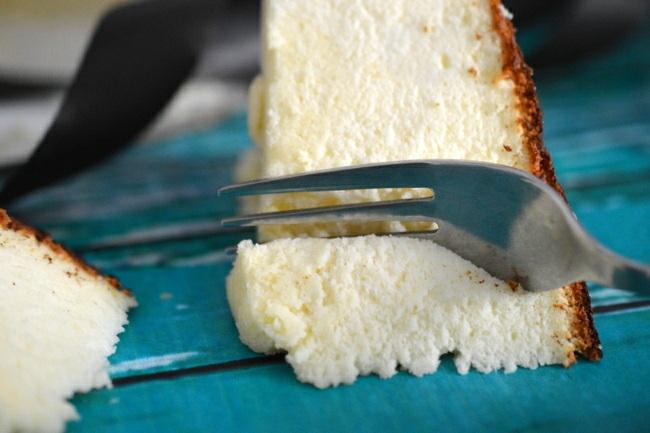
Japanese Cheese Cake aka Cotton Soft Cheese Cake. By its name, this is one of the most softest cake that you will ever experience. Very, very light , soft and spongy and as exactly as a cotton. But these are typically very temperamental to many factors. One is the temperature in which these have to be baked. The duration and how they are let to cool. Beyond these, the leavening that happens from egg whites, and the stage at which you need use the meringue is another most important factor.
Something that I am not very proud of even after making it for the 4th time. After having emptied all the cream cheeses that I could hunt. I ended up stopping with this, after actually emptying the shelves of the super markets and landed up with no more cream cheeses. For that matter I collected couple of mascarpone cheeses, just in case, I thought I can do my own version finally. But with this, I have concluded what are all the possible chances of failures and what needs to be kept in mind to save us on our first attempt.

My first attempt was all going good, but I followed the recipe I was referring to, as it is. I went ahead and baked it for 1 hour as per the recipe and I was casually watching a movie until my oven rang a bell. To my dismay it was totally burnt on the top. My family who usually want to relish my bakes hot from the oven, but got to it, because they always needed to be well photographed and then they lose the interest over it. But while I was upset over the burnt top, the entire family pounced over the cake. They were excited over, how a cake can be as soft as cotton. Well I never mentioned the name of it, as I was totally upset over it. But they never seemed to have cared my pain , they were almost half done with such a huge cake. I never had doubts, so I never had extra cream cheese. Well, to stick to the regime, I hunted and figured out cream cheeses from super markets near and far and ended up having for 2 more batches, just in case.
I tried again, where I was taking it for granted, as only the duration went over board and top burnt on the first attempt and I am going to nail it right this time. Few drops of yolks were mixed with my whites this time, I just went ahead, leaving my only leavening agent not do its job. It had a very flat cake, never rose. Now, that’s testing my temperament.

Then I wanted to be careful on the third attempt and to redo with all the care. I wanted the whites to whip up nicely taking all the care to not spill any yolks and giving it all the time to whip up beautifully. Well, I over did this time trying to be cautious and over beaten whites found it hard to combine with the rest of the batter, again leaving a very flat cake. Well, failing a cake on a 3rd attempt was my first ever

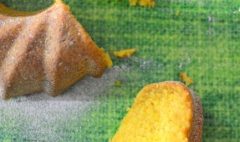
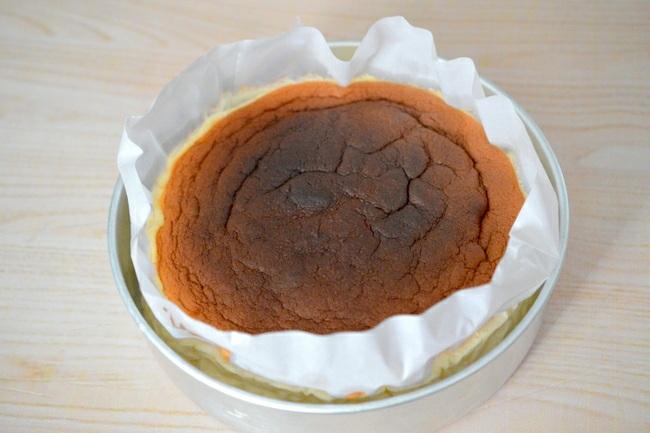
I again landed up with no more cream cheese at home. I headed to the only supermarket which might stock it and well they seemed to disappoint me saying, stocks yet to come. I found a couple of last few packs of cream cheese and the last couple packs of mascarpone cheese as well. Picked them up, with almost mugging up the measurements and the steps, I was sleep walking the process. So the final attempt, I had to keep in mind, the duration of baking, whites have to be whipped but not over whipped. It needs to be glossy and shiny but not dry. The pan what I need to use should be a deep pan, to give the cake its space to rise high up during the baking time, and settle down back to its original size after cooling down. I never had my deeps pans at the moment, so I lined the sides with butter paper taller than the cake pan, to allocate a wall space. I reduced baking time to 40 minutes, I should have stopped at 35. They were perfectly baked at the inside. I wasn’t pretty happy about how the sides shrunk and gave the wrinkled look. That is because of the butter paper I used. I would have had it looked better in a 5/18
deep pan. So well, the final conclusion is to use a deeper pan.
- Do not wait for the entire baking time of the recipe specified. Check for golden top, if its way below the specified baking time, then cover the top with aluminum foil and let to bake for further minutes.
- Beat the whites in medium speed for longer duration, but only up to a glossy, shiny stage. Do not over beat.
- Do not beat whites in high speed, that will end up making it dry.
- While folding the whites into the batter, be very gentle not to deflate the batter or over fold. The volume of the batter is very critical.
- Use a deep pan. Fill batter till 2/3rd full, giving it room to rise well high up and then it will settle down back to its original size.
- The sides of the cake will naturally shrink from the sides of the pan.
- Let the cake cool down in the oven after the baking is over. With the oven switched off and the oven door closed for 40 minutes. This will gradually bring down the temperature without shocking the cake.
Recipe source – Sugarywinzy
Ingredients:-
- Cream cheese – 260 gms
- Butter – 55 gms
- Milk – 100 gms
- All-purpose flour – 70 gms
- Corn flour – 45 gms
- 6/18Salt – 1/4 teaspoon
- Sugar – 165 gms (Divided, 55 gms & 110 gms)
- Eggs – 6, Separated
- Lemon juice – 1 teaspoon
- Cream or tartar – 1/4 teaspoon, (optional)
Method:
1. Pre-heat oven to 150 degree C. Butter a 10 inch diameter and a 5 inch deep cake pan. Line the bottom with butter paper.

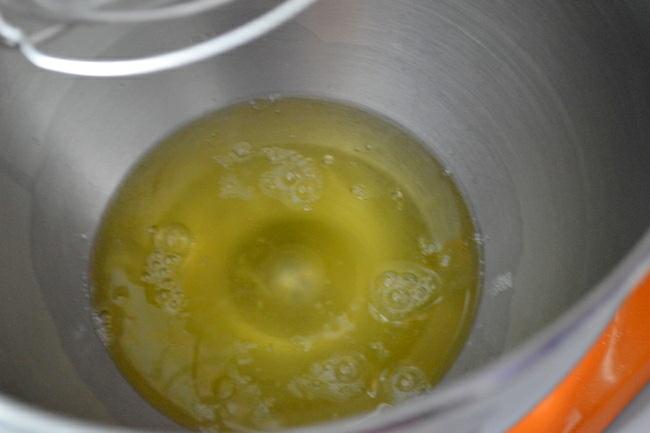
2. Add cream cheese, butter and milk in a heavy bottomed saucepan.

3. Bring it on medium flame and keep stirring constantly, until the butter and cream cheese will melt.
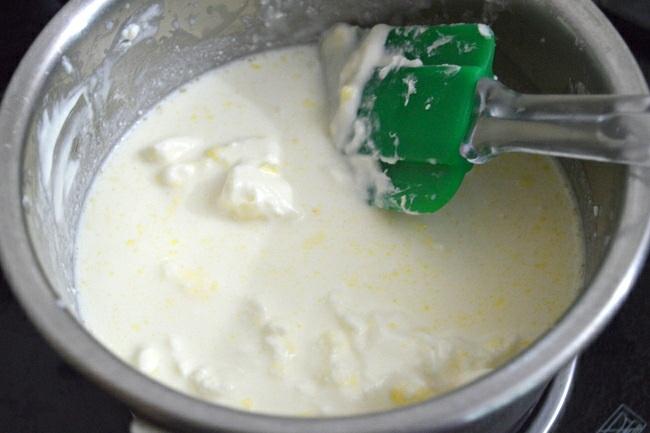
4. Continue to stir on low flame until the mixture is thoroughly melted without any lumps.
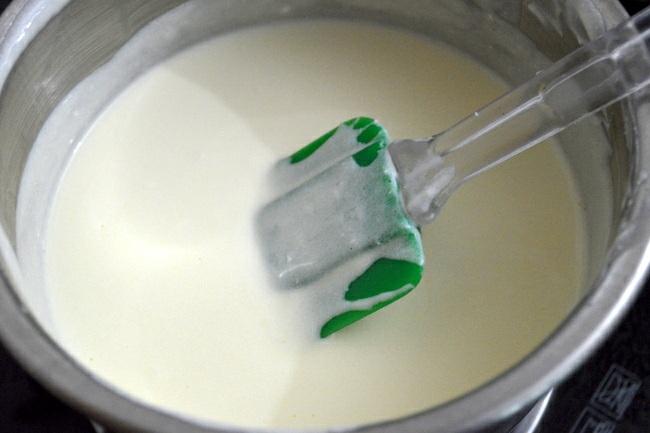
5. Transfer the contents into the bowl of your electric beater. Beat on medium speed for 1 minute.

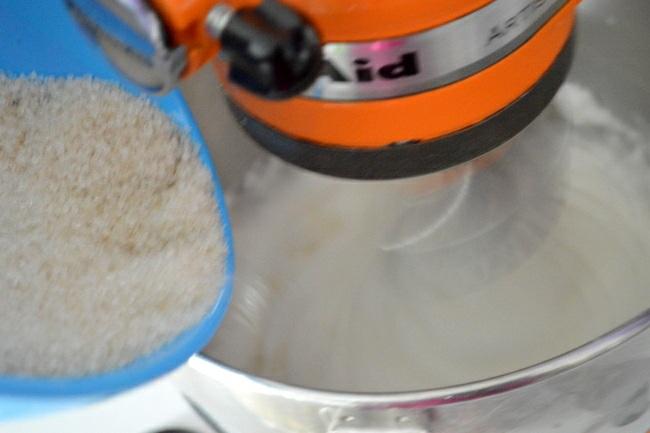
6. Mix together, flour, cornflour, salt and 55 gms of sugar. Add them all together into the cream cheese-butter mixture. Add all the yolks together.
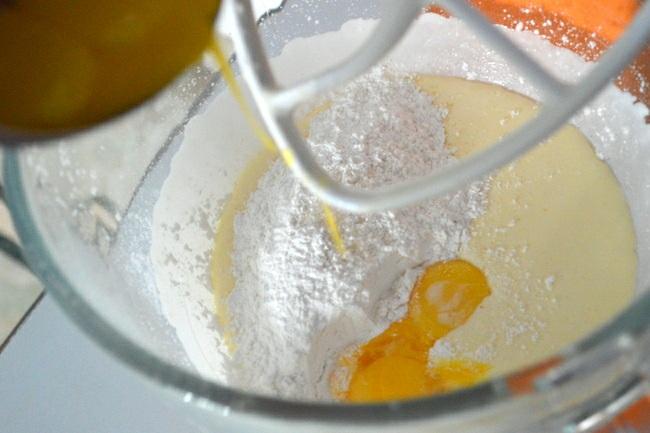
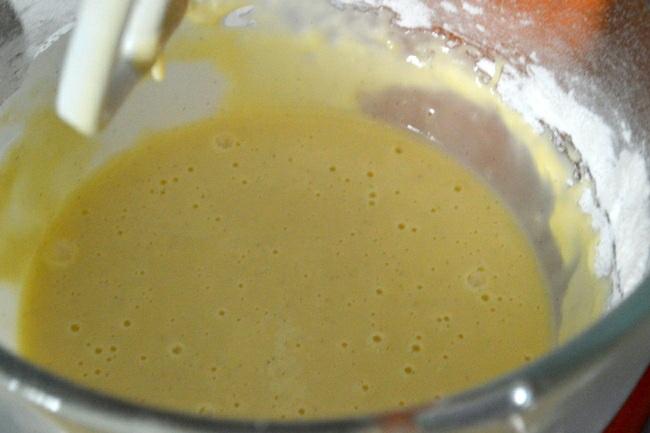
7. Beat on medium speed for 2 to 3 minutes until the mixture is all combined well. Set aside.
8. Add the whites in another clean and dry stainless steel bowl.
9. Beat on medium speed for 30 to 40 seconds until the whites become frothy. Add lemon juice and cream of tartar and beat for 10 more seconds. Start to add the remaining 110 gms of sugar in a steady stream while the beater is still running. Do not add all the sugar at once.
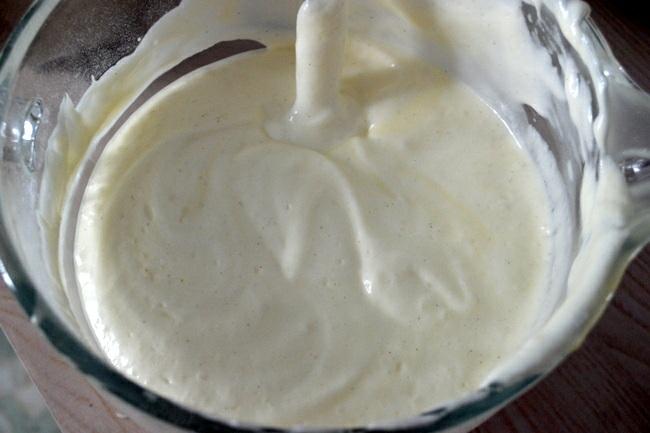
10. Continue to beat for 4 to 5 minutes on medium speed, until the meringue is glossy and shiny with soft peaks. Do not over beat.

11. Add just about a cup of the meringue into the other mixture. Gently fold it in. This will adapt the batter to add in more meringue.
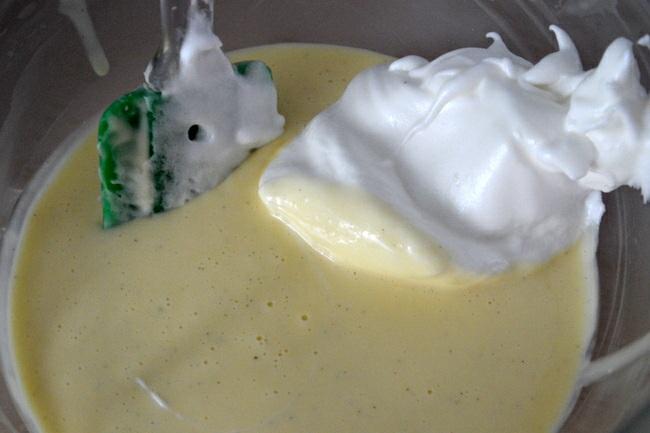
12. Again add a cup of the meringue into the batter and fold in gently. This will again thicken the batter and make it easy for the rest of the whites to combine.
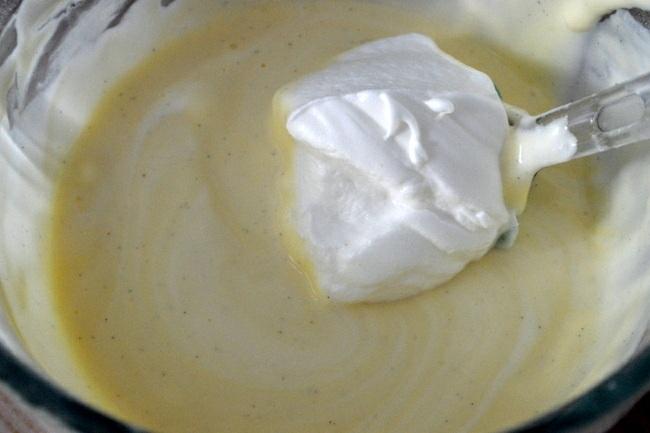
13. Now add half of the remaining meringue and fold it in gently. Cut and fold taking care not to over fold. When you start seeing streaks of the whites without completely combined, add the last portion of the whites and cut and fold gently.

14. You will have a final batter which is thick and voluminous.
15. Transfer the batter into the prepared cake pan. I have mine which is completely full. This is my first attempt. My last attempt had the sides lined with butter paper. Both aren’t advisable. Use a deep pan.
Heat about 5 cups of water until it boils. Pour the boiling water into a baking tray. Place the cake pan on the baking tray. Make sure the water is just half of the baking tray and the pan sits comfortably in the baking tray.
All my attempts I used the wire rack as in the picture. That added up to the height, browning my top even further. You can skip that and place the cake pan directly on the baking tray filled with boiling water.

16. Bake in pre-heated oven for 35 minutes at 150 degrees. Check the top if its reached the golden brown, switch off oven, keep the oven door closed and let it sit inside oven for 40 minutes. Then remove from oven and cool on wire rack. When its warm to the touch, unmould and cool on wire rack. Dust some icing sugar on top.
It is ready to be served warm. It needs to be stored in airtight container. Good in room temperature for 2 days. Refrigerate for up to 3 to 4 days. Microwave 5 to 10 seconds before serving.

Depending on the quantity of the flour, the cakey texture will prevail. The lesser the flour, the more the cheese cake texture.
I liked the more cakey texture, so I chose a recipe which had a good amount of flour. But to add to the cotton soft texture, part of the flour is replaced with cornflour.