Bake Along #38 – Basic Marble Loaf
February 27, 2020 2021-09-04 18:15Bake Along #38 – Basic Marble Loaf

Bake Along #38 – Basic Marble Loaf
This is the first time I am baking marble cake myself. Every time I think about it, I used to think what is so special about it? I know to bake the best vanilla cake and I can also whip up my favourite chocolate cake and when I can eat them separately what is so fascinating in putting them together.
After baking this now, I realised I wasn’t just right. It means so much more than my assumptions. And after quite a long time a batter that kept asking me to lick it again and again, was this one
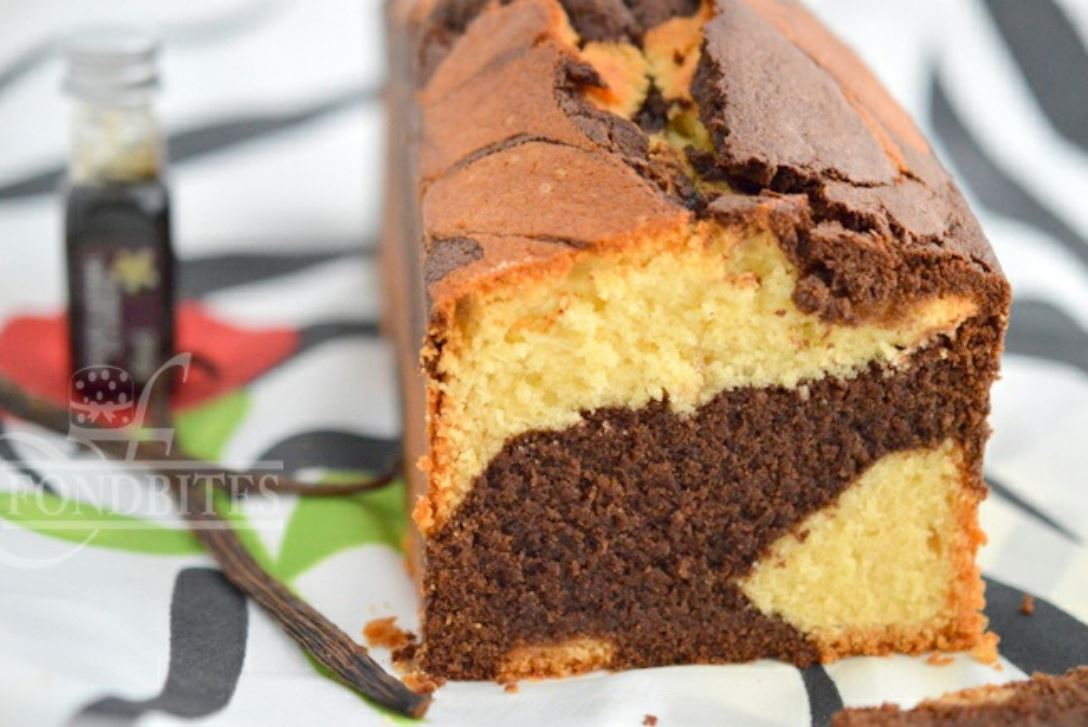
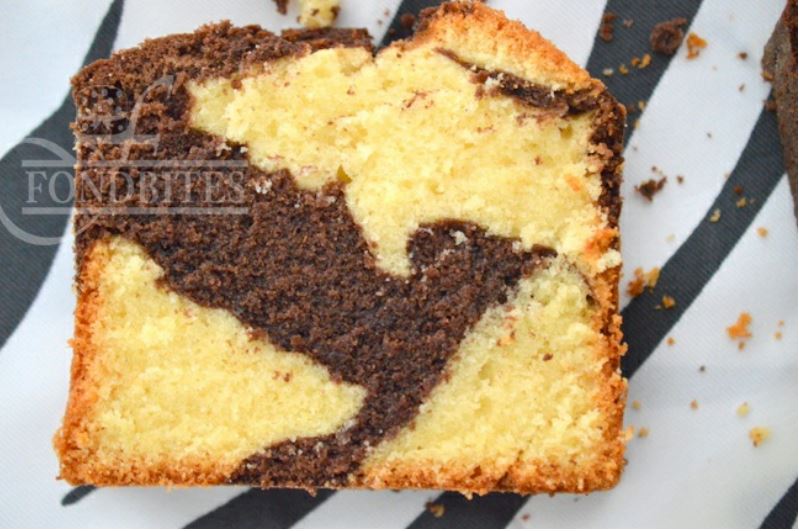
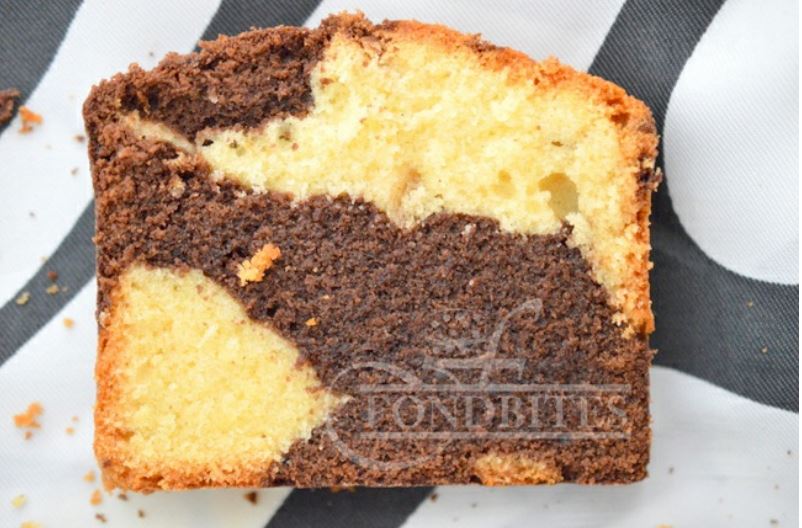
The medley of the deep vanilla and rich chocolate. Vanilla cuts down bitterness of chocolate, if any of you would feel chocolate is bitter. And chocolate enriches the mild vanilla. Here I want to insist, marbling a cake is not just vanilla and chocolate, but I chose the easiest. You can marble flavours, few choices can be, mint and chocolate, white chocolate and dark chocolate, orange and chocolate, strawberry and chocolate and the list could go on.
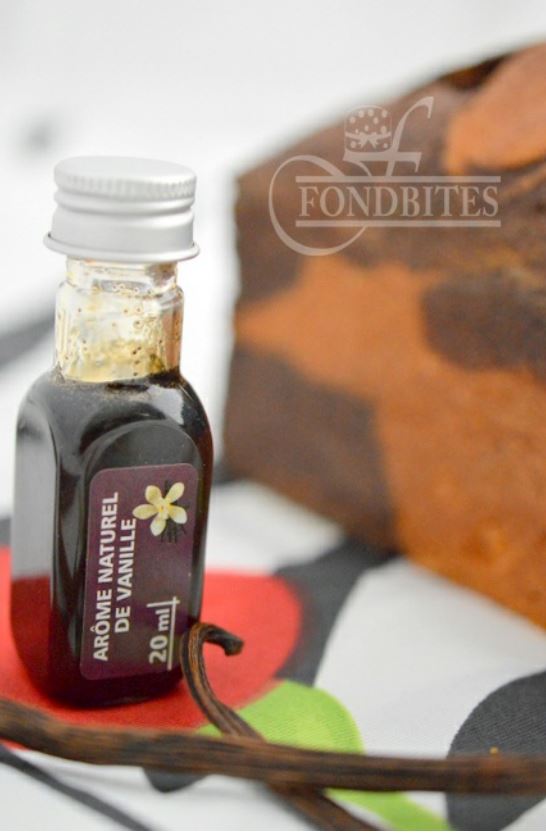
I decided to use an unopened vanilla extract I had reserved for a special bake where I needed vanilla flavour to over power. And I thought this should be the one. This extract was so thick with seeds of vanilla beans scrapped into the extract and definitely a pure extract makes a lot of difference to the product
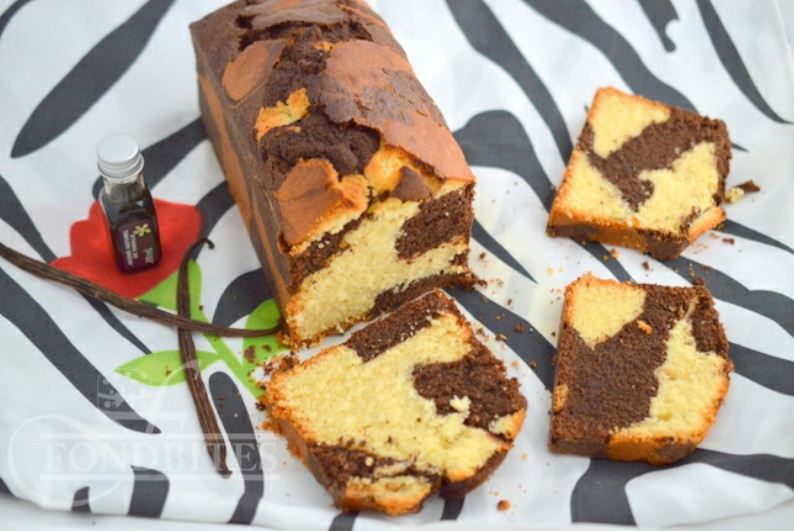
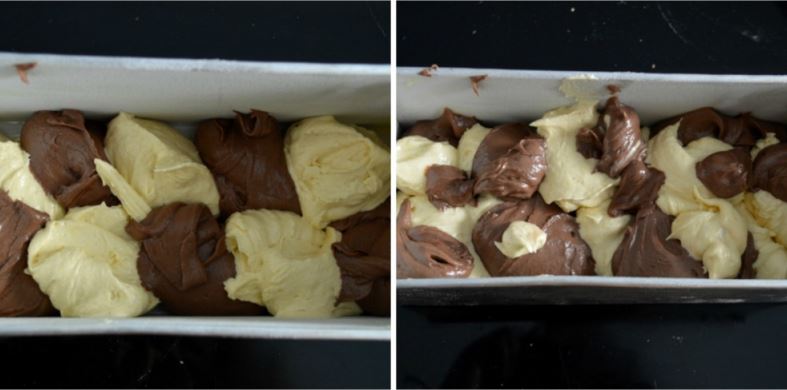
I decided to marble them like tiles, there are few other ways to marble as well. What I did was adding a scoop of vanilla batter and chocolate batter adjacent to each other and just finished using up both the batters and zig zagged the batter in the pan using a tooth pick. You can also choose to add a scoop of vanilla batter in the center of a round pan and then add chocolate batter into the center of the vanilla batter and keep alternating until you use up both batters. This forms more like a zebra cake. You can also decide to use tooth pick into this zebra pattern which will marbleize. Another way is to add one full layer of vanilla batter in the pan and smooth out. Then add chocolate batter on top and smooth out and this will give you distinct layers of 2 different colours. You can again choose to use tooth pick to run zig zag or leave it as layers.
Ingredients:
Recipe source: Baking from my home to yours
- Unsalted butter – 170 gms, at room temperature
- Caster sugar – 1 cup
- Eggs – 4
- Vanilla extract – 1 teaspoon
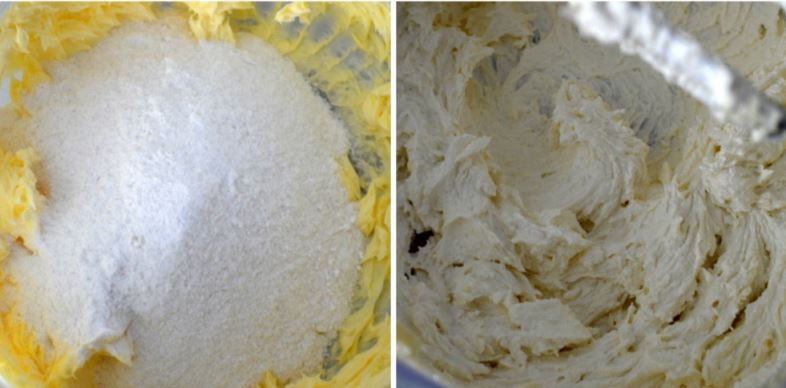
- All-purpose flour – 2 cups plus 2 tablespoons, loosely packed
- Baking powder – 1 1/4 teaspoons
- Salt – 1/2 teaspoon
- Milk – 1/2 cup, at room temperature
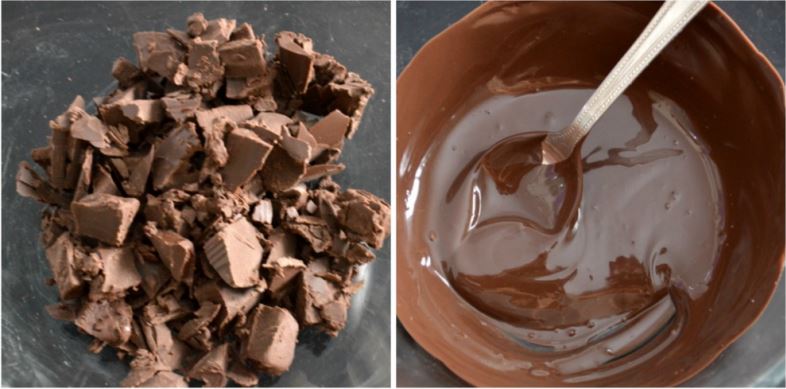
- Dark Chocolate – 120 gms
Method:
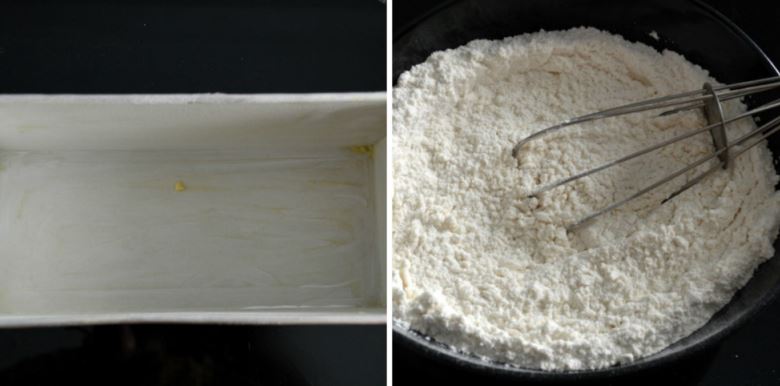
1. Pre-heat oven to 180 degree C. Butter and flour a 9 inch by 6 inch loaf pan. Sift together flour, baking powder and salt. Set aside.
2. Chop the chocolate and melt in microwave for 40 seconds and stir until chocolate is fully melted. You can also use double boiler to melt the chocolate. Set aside to cool a bit.
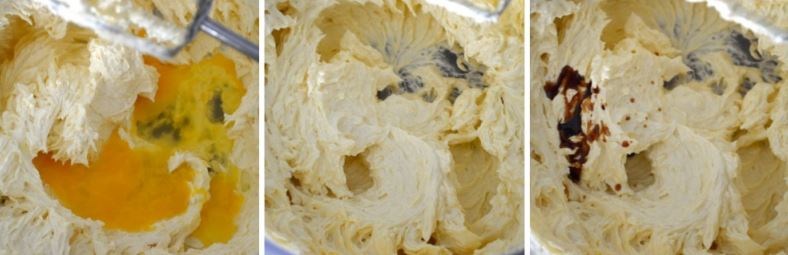
3. Add butter into the bowl of your electric beater and beat until light and fluffy.
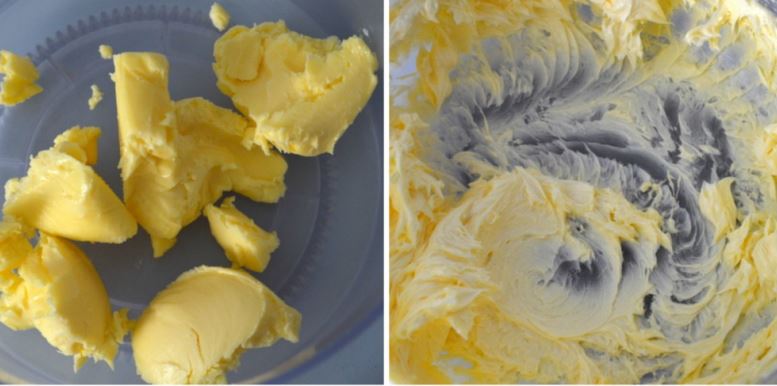
4. Add sugar to butter and beat on medium high speed for about 5 minutes until the mixture turns pale yellow, creamy and fluffy.
5. Add the eggs one by one and beat for about one minute after each addition of egg. Finally add vanilla extract and beat until it has been incorporated.
6. Add the flour mixture in 3 parts and milk in 2 parts, alternating both, starting and ending with flour mixture. Beat just until combined after each addition of flour and milk. Do not over beat after the addition of flour mixture.
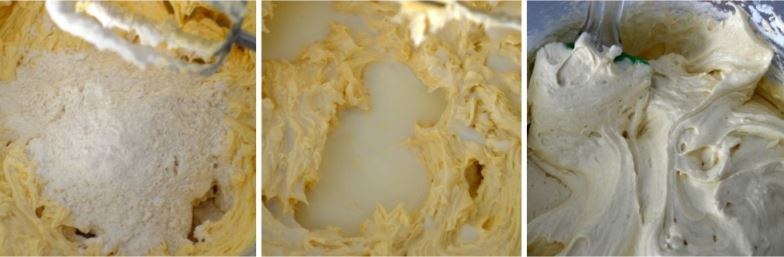
7. Transfer half of the batter to another bowl. Add the melted and cooled dark chocolate into one half of the batter and fold it using rubber spatula until completely blended. Do not over beat.

8. Alternate both batters and spoon them into the prepared loaf pan. Keep adding layers until you finish using both the batters. Tap the pan few times to get rid of air bubbles at the bottom.
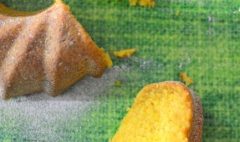
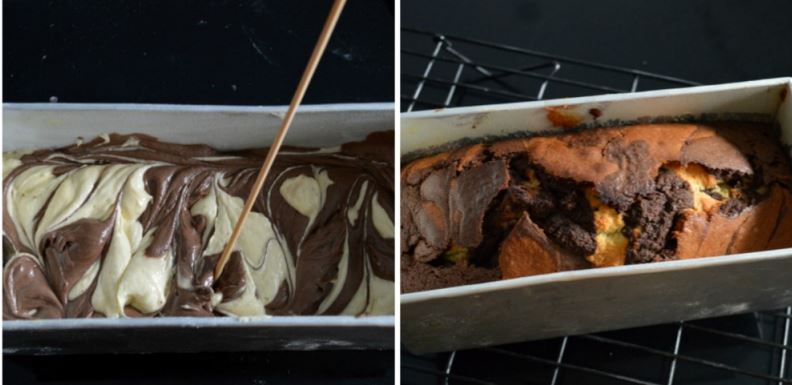
9. Use a skewer/toothpick to go zig zag just 4 to 6 times. You will be tempted to do more, but just control and not more than 6 times. Bake in pre-heated oven for about 60 minutes to 70 minutes until a tooth pick inserted into the center of the cake comes out clean. Cool on a wire rack for 10 minutes and invert pan to remove cake from pan and let cake cool completely to room temperature on the wire rack.
They are ready to be devoured right after cooling down.. Actually not, you can just bite into, while its hot/warm. Enjoy the crust first and then feel the soft inside and while trying to get to the equation of why this is so delicious when you take your first bite, also try to figure out how the cake is so sturdy yet very soft and flavours are mending so well and again I insist, feel the crust
This has been baked for Fondbites, Bake Along, a group of enthusiastic bakers, bake one recipe every week along with me. To join the group, send a join request in the facebook group and I will add you to the group.
Recipes of previous Bake Along can be viewed here
Members – Once after you finish baking, post the link of your
finished picture below using the linky tool.